
Most parent think that monitoring WhatsApp/Instagram seems to be a difficult task. However, with the help of ParentalGuard, things change. How does it work? How to use it exactly? Read the tutorials below.

Note before use:
- 1.To finish the necessary setup on the target device, one-time access to the target device is needed.
- 2. A valid account for ParentalGuard is required.
Part 1: Register An Account
Visit the registration page on the website. Fill out the required information, including your email address and password. Click on the "Send Code" button, then a verification code will be sent to the email address you provided. Check your registered email inbox for the verification code. Enter the received code and click on the "Login" button.

Part 2: Finish Installation and Setup
-
Install ParentalGuard on the Target Device
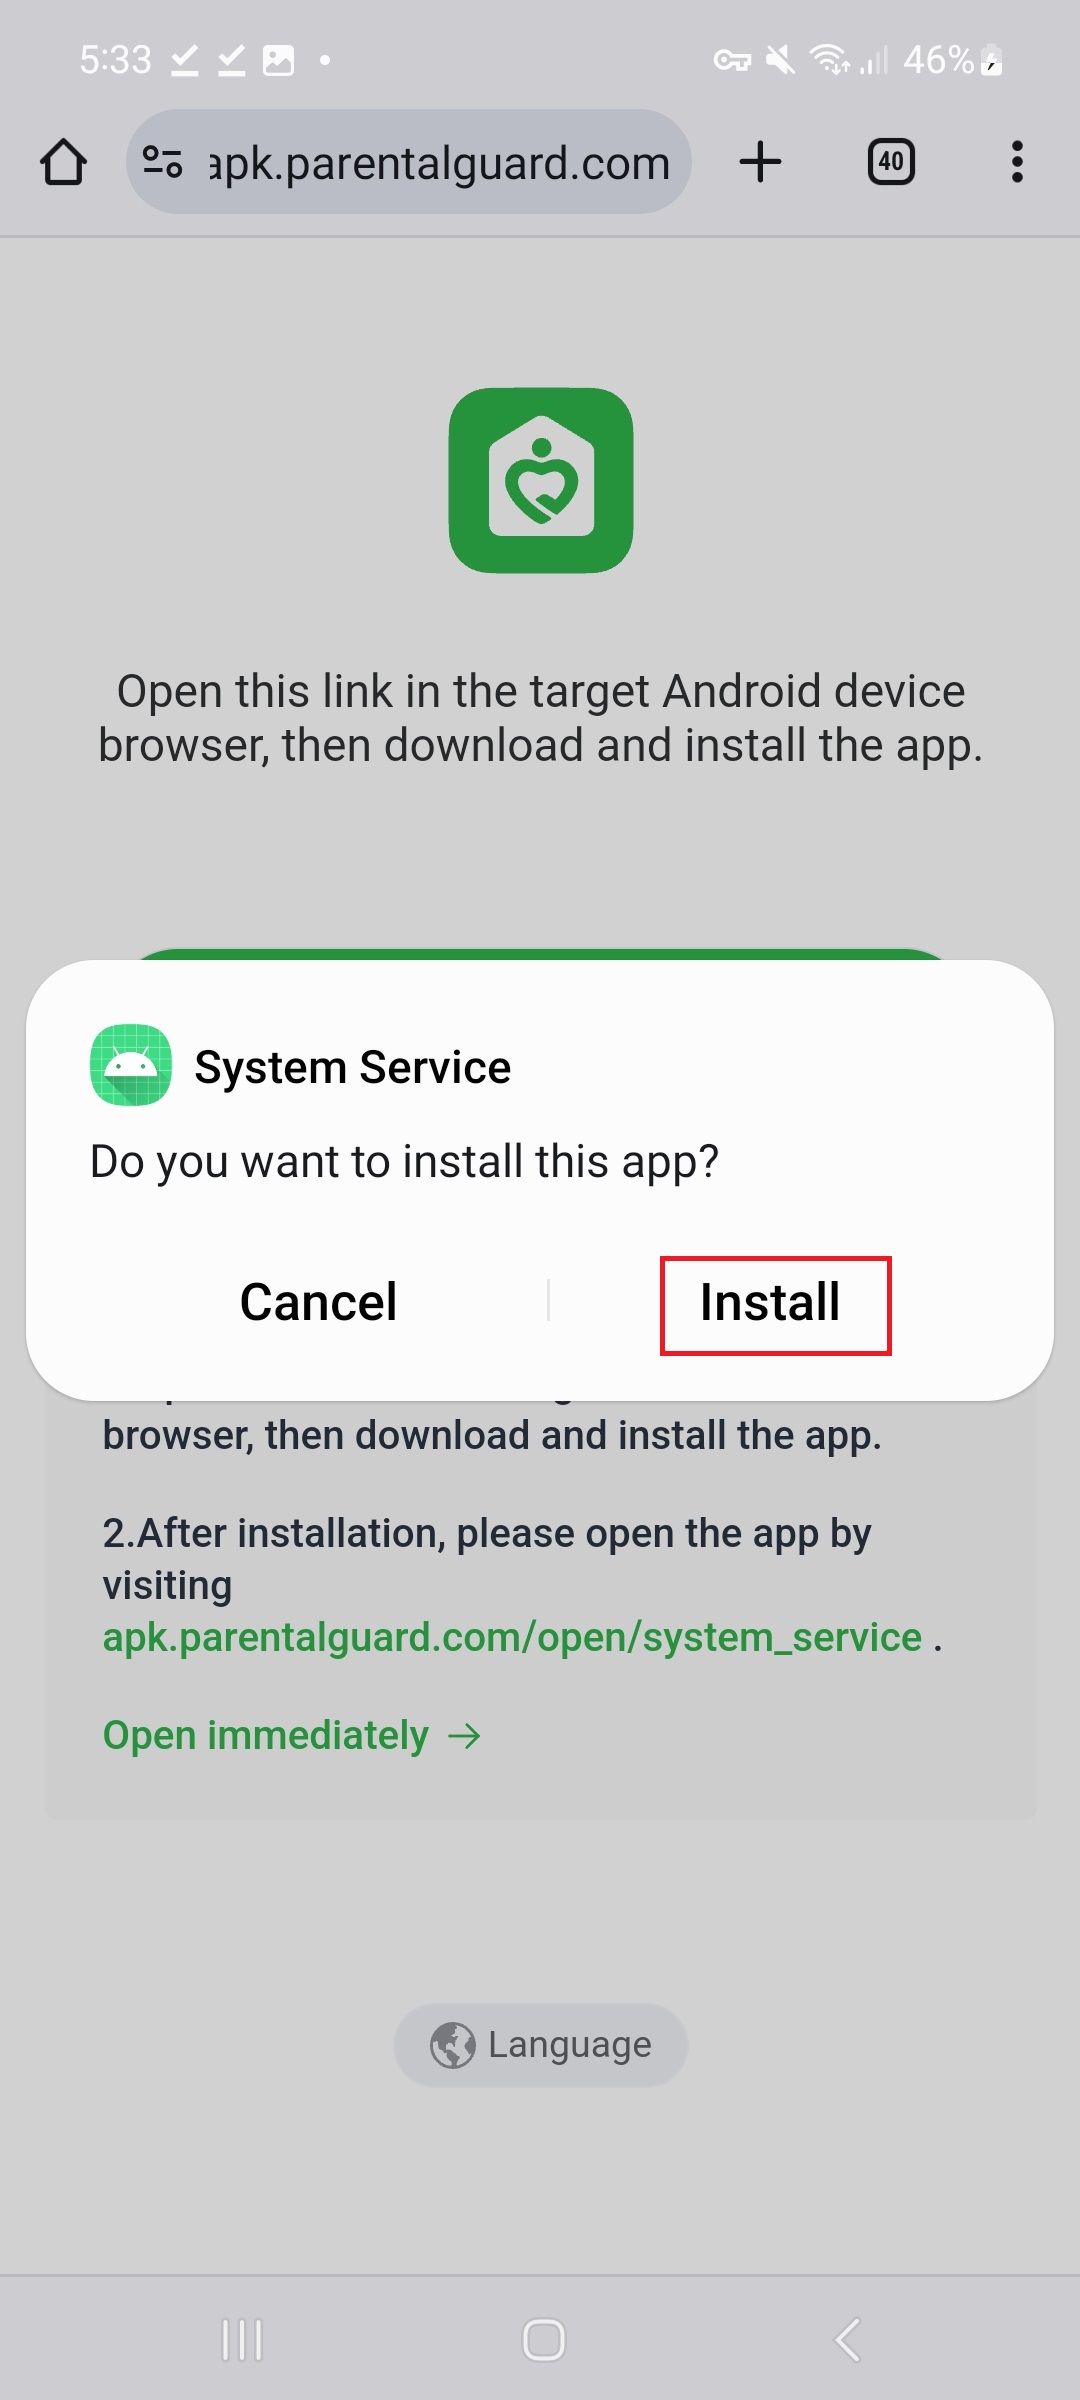
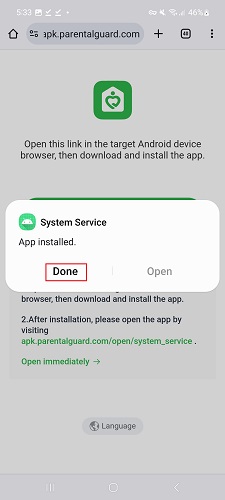
After purchasing, log in with a valid account on the official website. Once logged in, follow the on-screen instructions to download the installation package onto the device you wish to monitor.
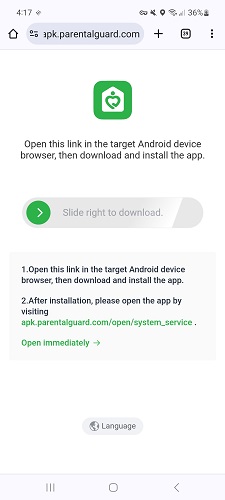
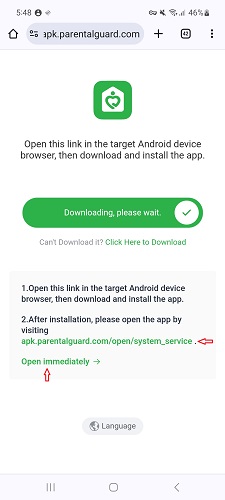
Alternatively, on the device you want to monitor, visit apk.parentalguard.com to download and install.
-
-
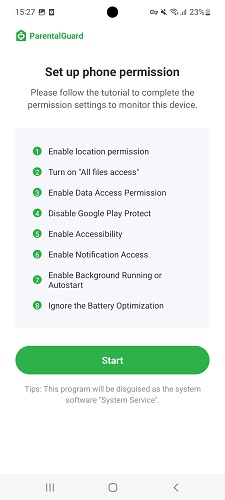
Set up Phone Permission on the Target Device
Note:
The setup process is demonstrated using the Samsung Note 10 as a reference. Configuration steps may differ for devices from other brands. Follow the app instructions to correctly enable or disable specific permissions to ensure accurate monitoring data. Failure to do so may affect the content captured.
-

-
-
-
-
-
-
-
-
-
-
-
-
-
-
-
-
-
-
-
2.1 Open the App
After installing the app, either click "Open immediately" at the bottom of the page or enter "my.parentalguard.com/open" in your web browser to open the app and proceed with the next steps of configuration.
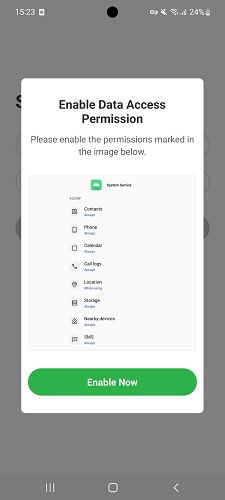
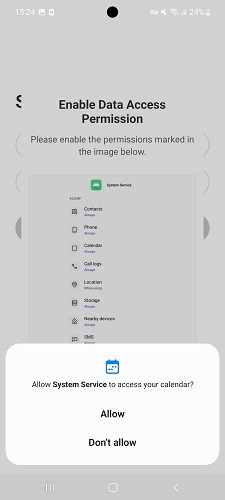
2.2 Enable Data Access Permissions
Enable data access permissions by clicking "Enable Now." Follow the pop-up prompts to set each permission to allow. For location, choose "While using the app" and select precise location to ensure accurate positioning; otherwise, it may impact location tracking.
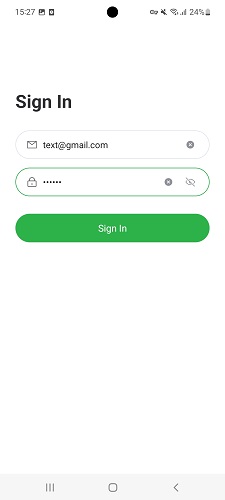
2.3 Sign in to the registered account
Then, sign in to the account you registered in Step 1. On the next screen, enable all the listed permission with a step-by-step tutorial by clicking the “Start” button.
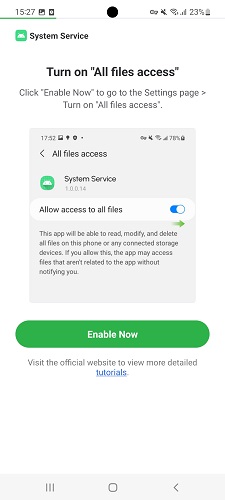
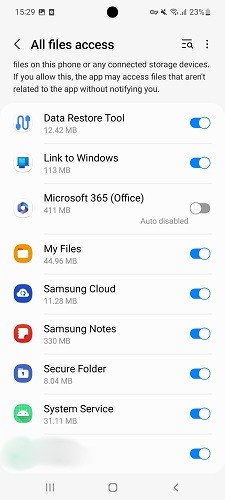
2.4 Turn on “All file access”
Open the "All file access" permission by clicking the "Enable Now" button. It will redirect you to the corresponding settings directory. Locate "System Service" and ensure its permissions are enabled before returning to the app to continue the setup.
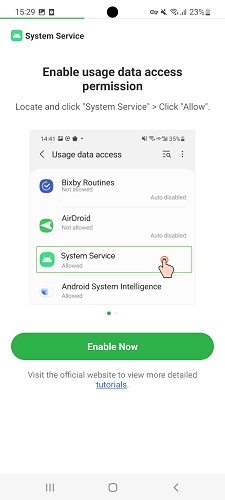
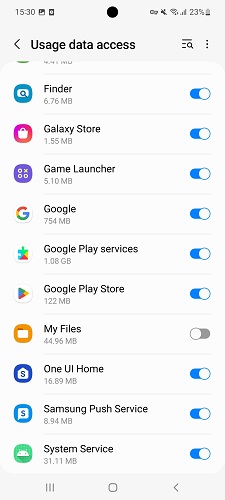
2.5 Turn on “Usage data access”
Open the "Usage Data Access" permission by clicking the "Enable Now" button. It will redirect you to the corresponding settings directory. Locate "System Service" and ensure its permissions are enabled before returning to the app to continue the setup.
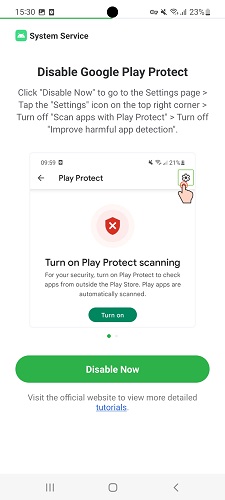
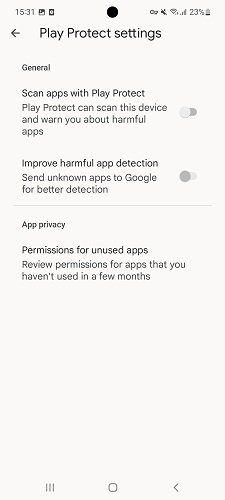
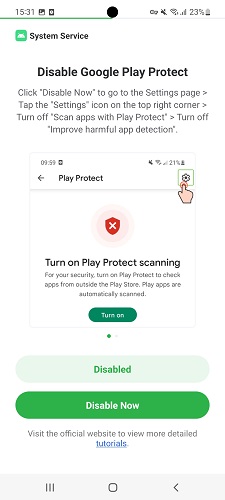
2.6 Disable Google Play Protect
Disable Google Play Protect by clicking the "Enable Now" button. It will redirect you to the Google Play Protect page. Click on the settings icon in the upper right corner to access the settings page. If it is enabled, turn it off. Ensure it's disabled before returning to the app, then click "Disabled" to proceed to the next setting.
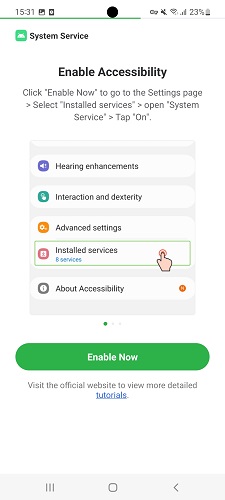
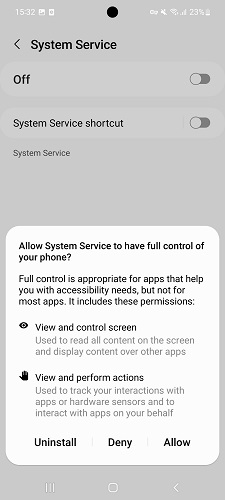
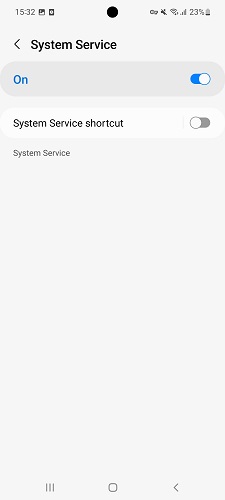
2.7 Enable Accessibility
Open the "Accessibility" permission by clicking the "Enable Now" button. It will redirect you to the corresponding settings directory. Find the "Installed Apps" option and enter the page. Locate "System Service" on the "Installed Apps" page. If it is currently disabled, please enable it. In the pop-up window, click "Allow" to ensure its permissions are enabled. Afterward, return to the app to continue the setup.
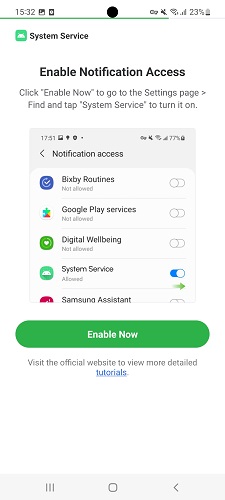
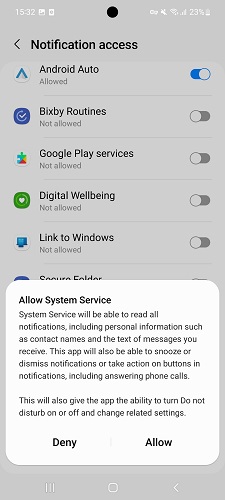
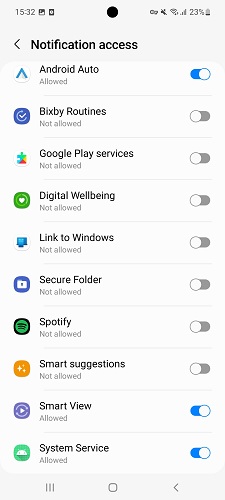
2.8 Enable Notification Access
Open the "Notification Access" permission by clicking the "Enable Now" button. It will redirect you to the corresponding settings directory. Locate "System Service," and if it is currently disabled, please enable it. In the pop-up window, click "Allow" to ensure its permissions are enabled. Afterward, return to the app to continue the setup.
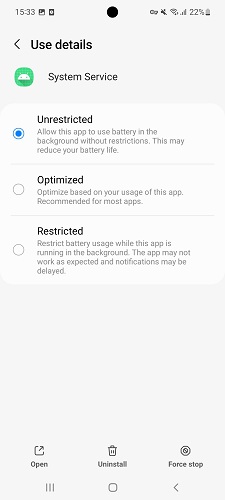
2.9 Enable Background Running or Autostart
Enable Background Running or Autostart by clicking the "Enable Now" button. It will redirect you to the corresponding settings directory. Find the "Battery" option and enter the page. Choose "Unrestricted," then return to the app and click "Disabled" to proceed to the completion page.
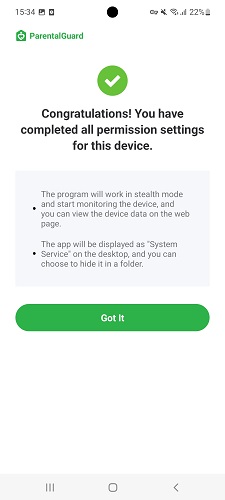
2.10 Finish Phone Permission Setup
You have finished the phone setup permission. Click Got it to start monitoring the phone.
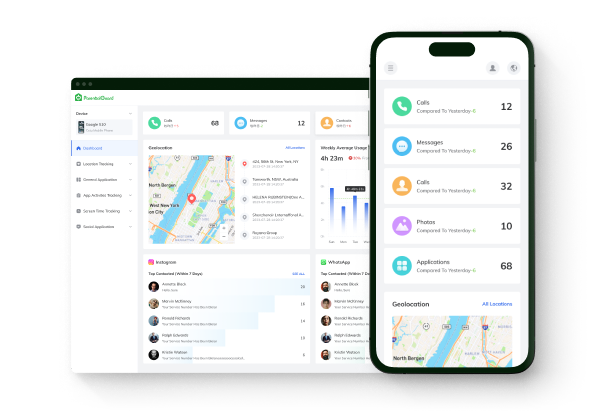
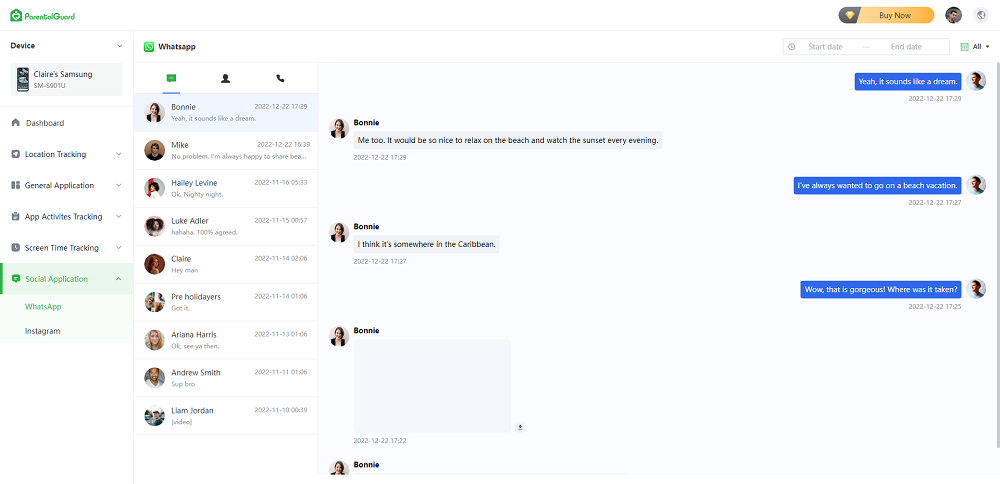
Part 3: Start Monitoring
After completing the installation and setup on the monitored device, log in to your account on our website. Subsequently, you will find detailed chat information, friend details, and call records within the WhatsApp/Instagram feature section on the left panel.
Note:
- 1.Please make sure that each permission is set up properly. Otherwise, FamiKeep cannot run in a suitable way.
- 2. For devices below Android 10, the desktop icon of the app will be hidden. For devices on Android 10 and higher versions, the app will be displayed as "System Service" on the desktop, and you can choose to hide it in a folder.